


These days, remote start systems are getting more and more user-friendly. What used to take ages to install now only takes an hour or two, if you know what you are doing. While many remote start systems can be installed fairly easily, be aware that installation requirements will vary from vehicle to vehicle.
In the following post, we will go over a basic guide for installing a remote start system in your vehicle to you can increase the value of your car.
How to Install A Remote Start
Compatibility
Before you buy your remote start system, consult the packaging or call the manufacturer to make sure that it is, in fact, compatible with your anti-theft system. It’s better to know before you make the purchase.
Familiarize Yourself
You should make every effort to familiarize yourself with your car’s electrical wiring. The best way to do this is to read your owner’s manual. The main wire connections you will want to familiarize yourself with are the ignition, power and accessories wiring and the starter.
If you no longer have your owner’s manual or misplaced it, you can always find this information online by typing in your car’s year, make, and model.
Disconnect your Car Battery
For safety’s sake, it is best to disconnect your car battery when installing your remote start system. You will need to reconnect it to test the remote start once it is installed, but for now, be sure to keep it disconnected.
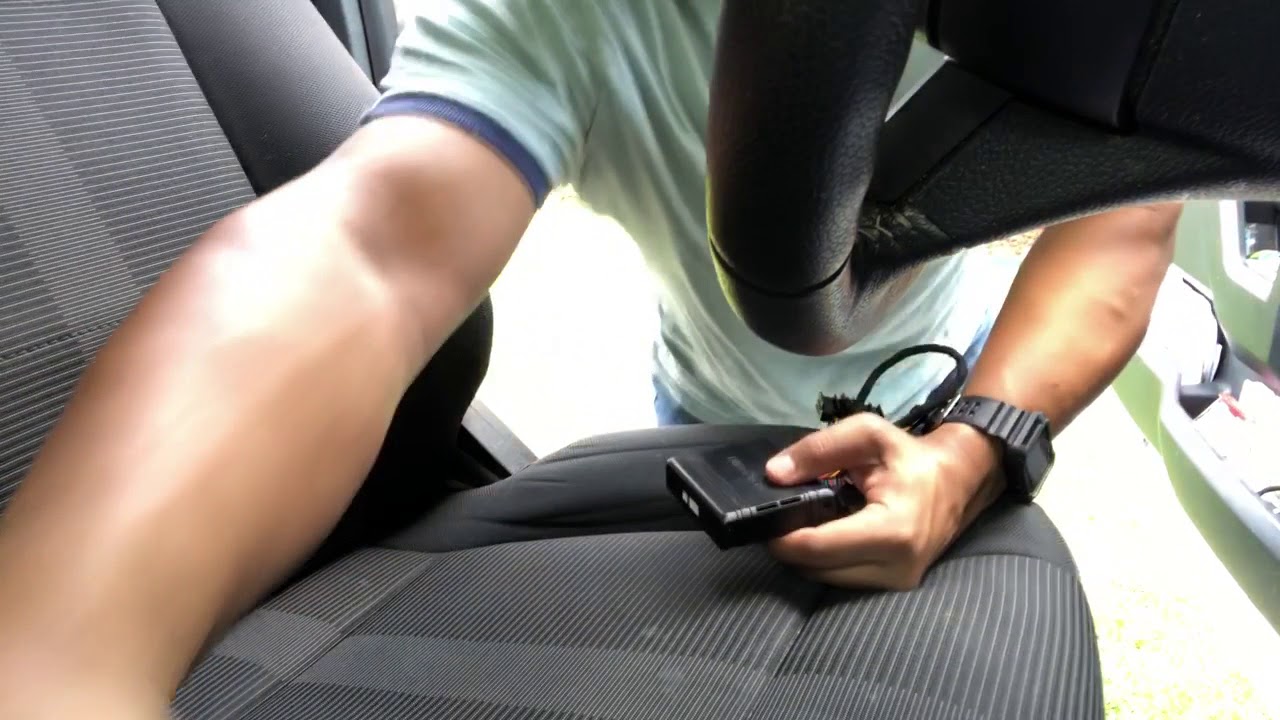
Remove the Panel
You will want to install the remote start unit somewhere out of sight and somewhere that won’t require any extending wires. For these reasons, the ideal installation spot is directly under the steering wheel. To access this area, you will need to remove the panel underneath your steering wheel. This can usually be done by removing a few screws with a screwdriver or screw gun.
Connect Wires
Using wire strippers, remove about a half-inch of the rubber coating around all wires that are to be connected (refer to the remote start instructions to see which wires will need to be connected). Attach the exposed wiring to the corresponding wires of the vehicle. You can do this with a soldering iron, heat-shrink tubing or at least electrical tape.
Locate the Ground Wire
The ground wire coming from your car’s starter will usually be black. Once you find it, attach it to a non-conductive surface in the kick panel to ground it.
Attach the Power Source
To power your remote start, you will need to hook it up to your car’s 12v power wire. This wire is usually located with the wires in the ignition switch but you should read your owner’s manual to find out exactly which one it is. Solder the power wires of your vehicle and your remote start together.
Ignition Output
Next, you will connect the remote start’s “ignition output” wire to your car’s main ignition wire.
Tachometer Wiring
Then, locate your tachometer wire (refer to your owner’s manual) and connect it with the sensor of your remote start system.
Final Steps
You should secure any loose or hanging wiring with non-conductive wraps for safety and neatness. Finally, reattach your under-steering wheel panel, reconnect the battery and enjoy your new remote start system!
Now you should be fully informed on how to install a remote car yourself and a few key things to note. We hope this article makes you feel more confident going into the process. A remote start doesn’t need to be installed by a professional; all it takes is a little bit of research to know how to install it on your vehicle and patience.